I've had this idea brewing in my head for a while now and I've finally created a tutorial for this supper fun summer top! All you need are two fat quarters (4 if you want to line it or make it reversible), some coordinating thread and a bit of bias tape.
 I made this to fit an 11 and 12 year old girls, however the size is pretty darned adjustable without changing a thing it would fit someone smaller or even larger (though I suspect if you are more than 5' 2" it would be a bit of a belly shirt.
First trim the fat quarters up to match at 17x20
next fold them both in half on the short side (it should measure 10" x 17". Place on your cutting mat and using a ruler make a diagonal line 5" from the fold on the top and 6" down the open side. cut using a rotary cutter.
 Do the same with your liner and that's it...all your cutting is done!
**At this point if you find sea creatures suddenly creeping onto your work surface...just ignore them, they usually get bored and move on...(with the son who brought them).

Next I like to serge around all the raw edges with my fancy smancy serger (really all I've mastered on the thing) but I bought it from a lovely little Russian woman who assured me I could sew clothes for my whole family! Of course if you don't have a serger you can zigzag your raw edges as well.
 Now sew your two side edges together for liner and outside fabric, your pieces should look like this:
 With right sides facing sew along this 11" side and press seams open.
 Now turn your outside print right side out and place it inside the liner (right sides should be facing).
 Sew the two pieces together around the bottom hem I use about a 1/4" but you can do more or less if you like. Now turn your piece right side out and press bottom hem and then do a nice top stitch.
 The rest You may want to pin as you work, I am a bit willy-nilly and tend to not waste time with pinning. Just remember that if you want this to be reversible you need to have all seems on the inside of the two layers.
Starting about 1 1/2" down from the top turn your arm sections to the inside about 1/4" and pin all the way around to 1 1/2" from the top of the other side. IF you aren't pinning like me than you can sort of fold as you stitch (like me), it looks something like this:
 And something like this when you are done. See the nice opening at the top?
 Do the same thing along the top folding under a scant 1/4" and top stitch, then without folding sew another line just about the arm stitch all the way across (I just used my top stitching as a guide to keep strait).
 Do this for both the front and the back and you end up with a a nice little pocket for your ties (bias tape).
 Next, cut your bias tape into 2 long pieces, mine measured 38" and I left them long as the girls liked the ties hanging on their shoulders. Sew a strait line down the side of the bias tape to keep it all neat and together. Of course you could make ties just as easily from coordinating fabric, I just thought the bias tape was quicker and easier (and readily available in my sewing box). Here I just stuck with the same thread and enjoyed the contrast, if you prefer you could match your colors accordingly.
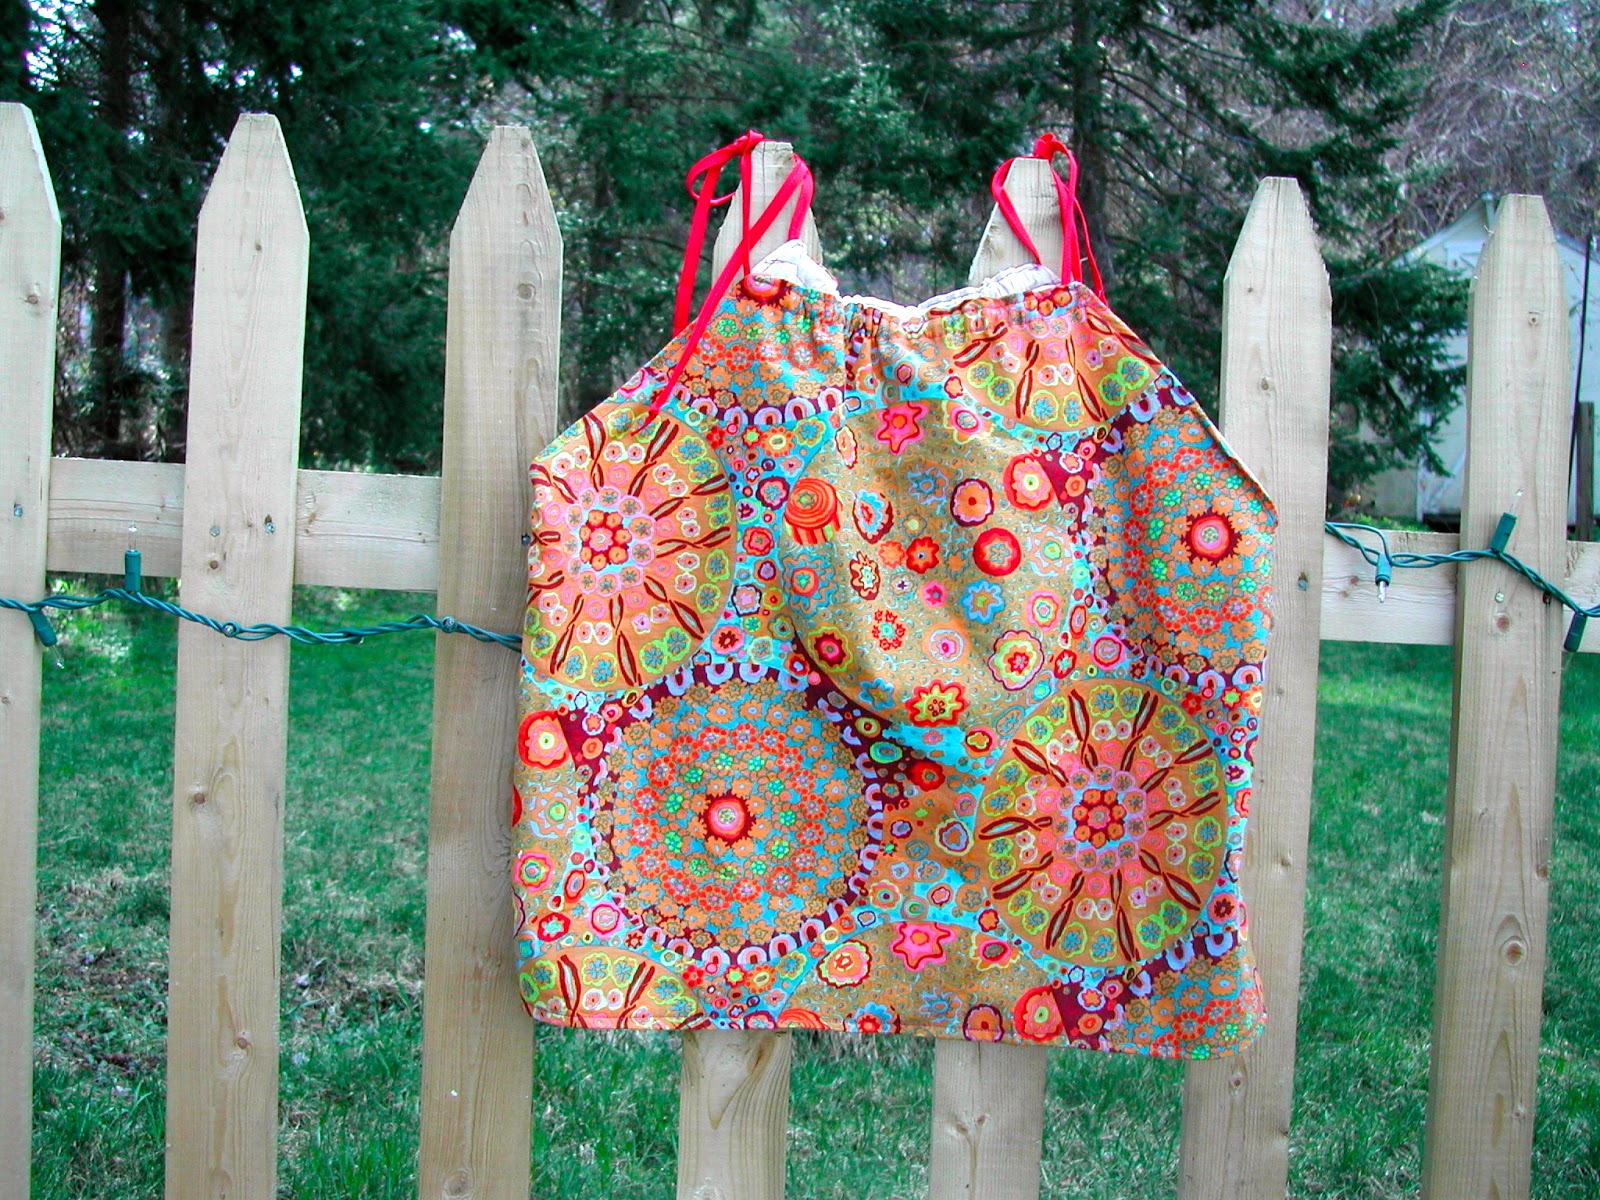
 Finally thread your ties through with a safety pin or other fancy tool of your choice and enjoy!


 Hope you enjoy and please let me know if you make one of these! I'd love to see it.

First trim the fat quarters up to match at 17x20
next fold them both in half on the short side (it should measure 10" x 17". Place on your cutting mat and using a ruler make a diagonal line 5" from the fold on the top and 6" down the open side. cut using a rotary cutter.

**At this point if you find sea creatures suddenly creeping onto your work surface...just ignore them, they usually get bored and move on...(with the son who brought them).

Next I like to serge around all the raw edges with my fancy smancy serger (really all I've mastered on the thing) but I bought it from a lovely little Russian woman who assured me I could sew clothes for my whole family! Of course if you don't have a serger you can zigzag your raw edges as well.


Starting about 1 1/2" down from the top turn your arm sections to the inside about 1/4" and pin all the way around to 1 1/2" from the top of the other side. IF you aren't pinning like me than you can sort of fold as you stitch (like me), it looks something like this:


So so clever! Love the print!
ReplyDeletelove that fabric! and you know, i bought some of that a while back but in different colors. i dont know why i didnt buy those colors. i like them much better.
ReplyDeleteI'm with Swanski...so clever! Thanks for the tutorial. :)
ReplyDeletePretty! Sewing always looks so easy when someone else does it.
ReplyDeleteThe tops look very cute Angie. Jacinta
ReplyDeleteI can imagine making a few of these. Thanks for the tutorial. I do love the fabric you used.
ReplyDelete